
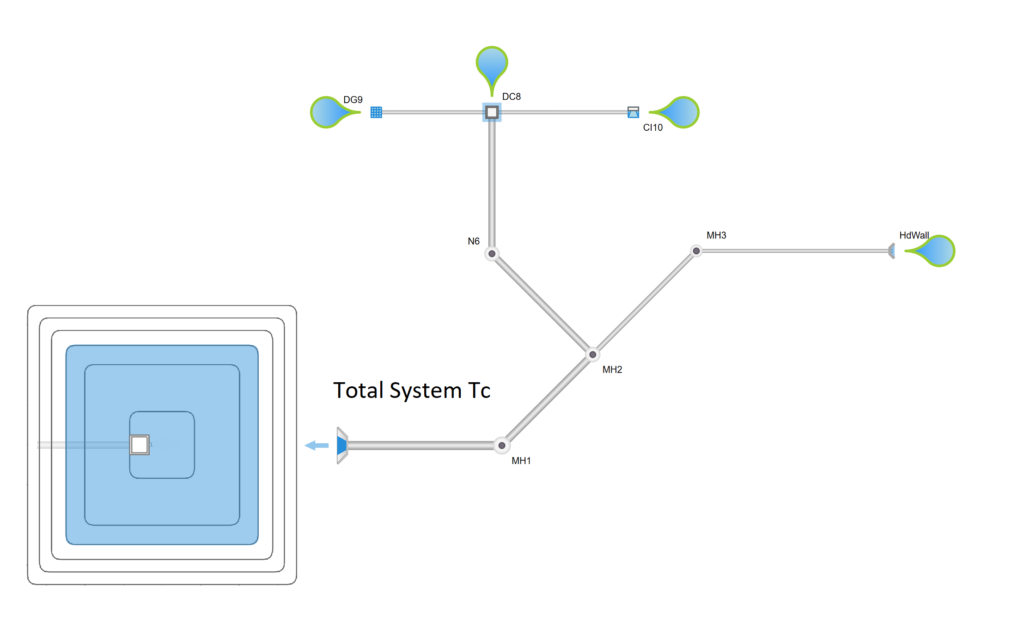
You may encounter site development drainage plans that include both storm sewer networks and detention ponds. One such scenario is shown below where a storm sewer system outfalls into a pond.
While Stormwater Studio does not include detention pond modeling in its feature set, its cousin, Hydrology Studio, does. In case you have Hydrology Studio on your desktop, you will need to use it to model this pond.
The challenge becomes, “How do I create an inflow hydrograph from this storm sewer for use in the detention pond?”
It’s standard practice to use the Rational method for storm sewer design, but not for detention pond design. Most drainage authorities require the use of the Unit Hydrograph method, namely the NRCS method, for this type of analysis which takes into account volume and peak Qs. Regardless of which method you use, Rational or NRCS, here’s how to connect your storm sewer to a detention pond.
- Design your storm sewer system using the Rational method in Stormwater Studio.
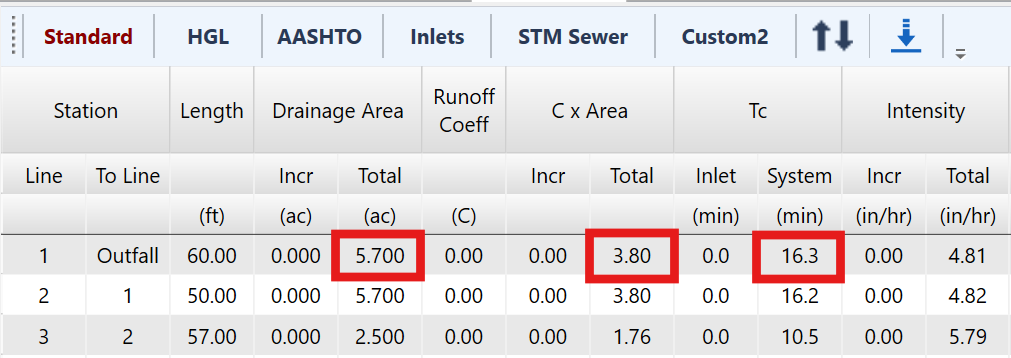
- From the Reports tab in Stormwater Studio, note the Total Drainage Area and System Tc in the Standard Report at the most downstream Line (Outfall). In the case above the total area is 5.7 acres and a Tc at the Outfall of 16.30 minutes.
- Launch Hydrology Studio and add a runoff hydrograph of your choice, Rational or NRCS.
- Rational Method: Use the Total (C x A) output at the Outfall to get the composite C value. C = (C x A)/A. In this case C = 3.80/5.7 = 0.67. Now you can use these inputs, (C, Area and Tc) in Hydrology Studio to create an equivalent Rational method inflow hydrograph.
- NRCS Method: Use the Total (C x A) output at the Outfall to get the composite C value. C = (C x A)/A. In this case C = 3.80/5.7 = 0.67. Convert the C to an equivalent CN value. We’ll choose 80 based on soil type, etc. Now you can use these inputs, (CN, Area and Tc) in Hydrology Studio to create an equivalent NRCS inflow hydrograph.
- Create and model your detention pond in Hydrology Studio.
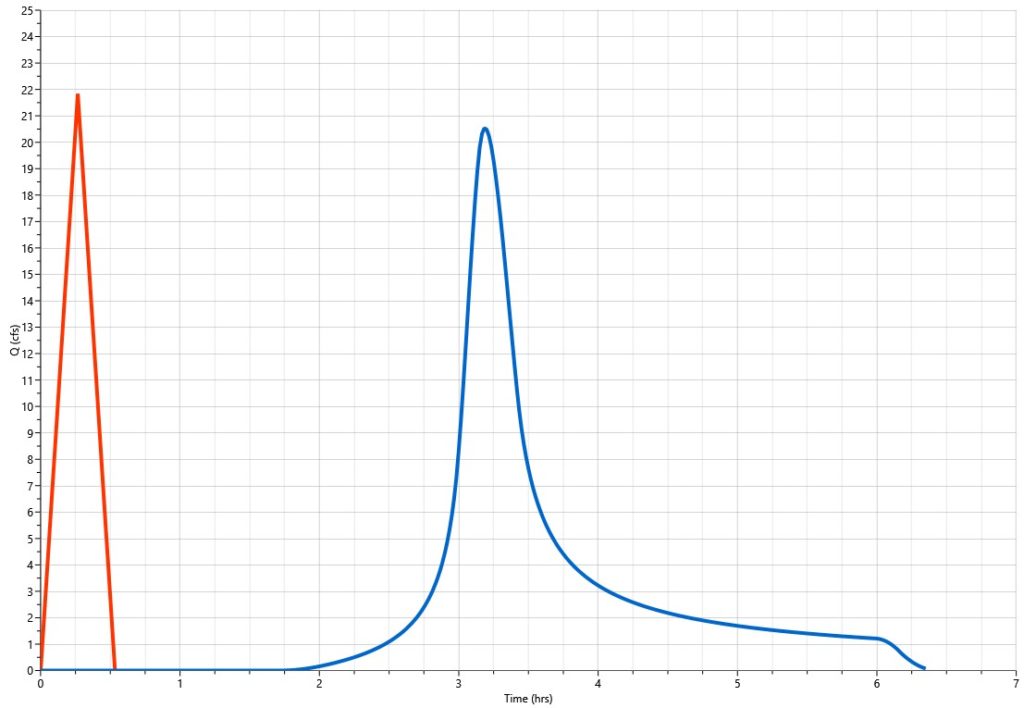
Here are the two inflow hydrographs created in Hydrology Studio. Interestingly the Q peaks, in both inflow hydrographs as well as Stormwater Studio are very similar.
Below is the simple Basin Model for this scenario using the NRCS method for the Inflow hydrograph. Simply use the inputs generated in Step 5 above (Step 4 if using the Rational method) to create the inflow hydrograph for the detention pond.

What About the Reverse?
If you’re needing to do the opposite of this scenario, i.e., the pond outflows into an existing or new storm sewer system, use the peak Q out of the pond as a known flow rate into your storm sewer. They are typically designed using a peak Q via the rational method.