Stormwater Studio includes an innovative feature located on the Profile tab that lets you participate in the design calculations in real time. While viewing a profile plot you’ll see a toolbar located on the upper right. It contains a variety of tools to let you modify the Line data. After making an edit, the software immediately updates the model and the hydraulics.
For example, you can increase or decrease the pipe sizes, inverts, rim elevations for a given Line during the calculation process. This allows you to fine tune your design for optimal cost effectiveness.
At the upper right of your profile plot, you’ll see the following toolbar.

It’s divided up into categories or sections.
Here’s the process:
- Select the Lines to include in your profile and then go to the Profile tab.
- Select the Line you wish to make edits to by clicking on its junction, pipe or use the Line Selector.
- Make the edits using the toolbar.
- Click the Run button located on the toolbar. This step can be automated by clicking the Auto toggle button next to the Run button.
Tip: You can view the selected Line’s numerical results by clicking on the Results tab on the Input window.
Line Selector

Use this to select the Line you want to make edits to. When viewing multiple lines at once, it simply chooses the next or previous Line in the selected group. If viewing only a single Line, it will choose the next connecting Line. Not necessarily the next or previous line number.
Alternate: When viewing a selection of Lines, you can also select a line by clicking on the line itself or its junction in the profile drawing. The bottom section of the junction will be highlighted in dark red.
Incremental Edits

This tool is used to make changes to the Invert elevations, Rim elevation and pipe Rise. For example, to increase or decrease the Line’s Rise, toggle the Size button and click the Up or Down arrows. If the Line is circular in shape, both Rise and Span are affected. It uses the pre-programmed pipe sizes as listed in Useful Tables.
Increments
Invert Dn, Invert Up and Rim may be selected all together or singularly. Their values will increase by .01 ft. (.001 m) for each click of the Up/Down arrows. Hold the [Shift] key to increase by 0.1 ft. (0.01 m). Hold the [Ctrl] key to increase by 1.0 ft. (0.10 m).
Alignment Edits
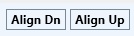
Use these buttons to re-align the downstream or upstream ends of the Line. It will adhere to the current settings on the Pipe Design tab.
Align Dn
Will match the crown or invert with the downstream line, based on Pipe Design options.
Align Up
Matches the crown or invert with the upstream line, based on Pipe Design options.
Redesign

This will redesign this Line using the current settings on the Pipe Design tab. You’ll have two options:
- Pipe Only – Redesigns the pipe size only and preserves the current invert elevations.
- Pipe and Inverts – Resizes the pipe using the “Full Design” calculation option and it’s current “Follow Ground Surface” settings on the Compute tab.
Compute & Auto Compute
This re-computes the HGL using the most recent edits.

Auto Compute is an option that will automatically re-compute the system if toggled on as shown below.

Revert

This is similar to an undo command. It reverts back to the Line’s original data.