
Stormwater Studio can import a plan layout of up to 200 Lines from a DXF file. You can have the program merge this imported file with your existing plan or start a new plan. The total number of lines cannot exceed 200. You can also import invert elevations if needed.
Once lines are imported, the program computes their lengths, downstream line numbers and deflection angles and assigns them to the corresponding alignment data. All that is needed after that is the missing data such as the runoff data, inlet type, etc.

Rules For Importing From DXF
First, create your storm sewer layout in your CAD software and adhere to following rules:
1. Draw the storm sewer lines in your CAD program as single “Line” segments, “Polylines” or “LWPolylines”. It is recommended to use a separate Layer for this and that it contains only your pipe segments. Don’t attempt to include any types of structures or inlets. Only pipes can be imported. Stormwater Studio will assign a default structure after importing.
2. Draw each pipe in an upstream direction. Otherwise, the software has no way of determining the flow direction.
3. It is recommended that you use the CAD program’s Snap feature, i.e., the line segment’s coordinates must connect within +/- 2 feet.
4. The CAD X, Y coordinates must be positive.
5. It is recommended that you specify a string-based layer name in your CAD program. Try to begin the layer names with a character, not a number.
6. You can only import one system (one outfall) at a time. If you want to import multiple systems, you’ll need to import them separately.
How to Import Lines From DXF
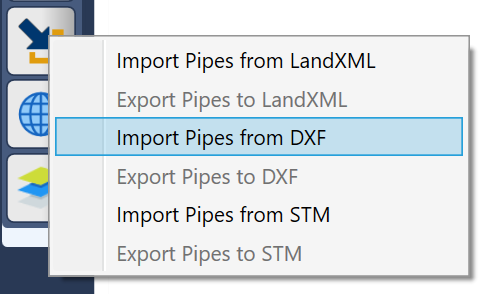
To import your lines, select “Import Lines from DXF” on the Import/Export menu on the side toolbar located on the Plan tab.
Next, enter the name of the file you wish to import. It must have a DXF file extension.
The following dialog box appears.

Layer Name
Select the name of the Layer that was used in your CAD program. Click the Layer Name list box to show all of the available layers. Then click the desired layer name.
New Layout
Click this option button for a new project.
Merge to Existing
Click this option button only if you want to connect the imported lines to the current system. Next, select a line number to connect to or choose, “New Outfall”.
Include Elevations
Check this box ON if you have assigned invert elevations (Z- coordinates) to each of the Line segments and you want to include them in the import.
When finished, click the [Import] button. You may need to click the [Zoom to Extents] button on the side tool bar to view the drawing when merging.
Troubleshooting DXF Imports
Stormwater Studio tries to piece together the network by connecting Line segments with similar (+ or – 2 feet) coordinates. In the end, there should only be one line that it couldn’t connect… Line 1 or an Outfall. If it cannot configure your import file, it’s probably due to:
- The lines not being drawn in the upstream direction.
- Two or more lines couldn’t be coordinate-matched. Check your CAD drawing for these possibilities and try again.
Exporting Lines to DXF
Any plan layout can be exported to a DXF file. To export, select, “Export Lines as DXF” from the Import/Export menu.

Next, enter the name of the file you wish to export. Note that the labels, Lines, etc. will be assigned to individual layers so that you can use or delete them if needed.
Exporting Profiles to DXF
You can also export your Profiles to a DXF file. Learn more here.