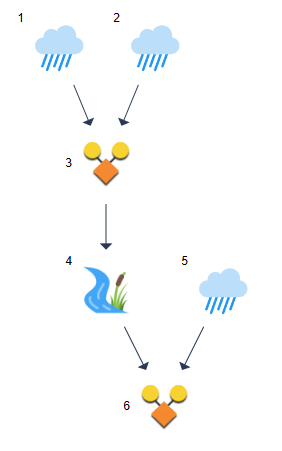
Your basin model should always begin with a Runoff-type hydrograph at the upstream end of your watershed.
There are four different types of runoff hydrographs you can use.
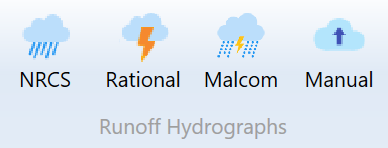
- NRCS
- Rational (includes Modified Rational)
- Malcom (Small Watershed Hydrograph) method
- Manual entry or imported
As shown in the Overview section, your basin model can be constructed and edited from any of the three tabs on the Main Window. Namely, Basin Model, Table or Charts. The procedure is basically the same from each tab.
Basin Model Tab
Click anywhere on the canvas to insure you don’t have any existing hydrographs selected. Then click one of the three runoff hydrograph buttons on the Ribbon Toolbar. Hydrology Studio places the corresponding icon on the basin model. You can move the icon around as needed by dragging it with your mouse.
Table Tab
Click an unused or empty row on the grid. Then click one of the three runoff hydrograph buttons on the Ribbon Toolbar.
Charts Tab
Click on an unused row on the Hydrographs List box. Then click one of the three runoff hydrograph buttons on the Ribbon Toolbar.
While in the Table or Charts tab, you can select any of the unused hydrograph rows for your next hydrograph, but while in the Basin Model tab, it automatically assigns the next higher number available.
Building Your First Watershed Model
If you haven’t already done so, please check out this step-by-step tutorial of how to build a simple watershed.
How to Modify or Edit Your Basin Model
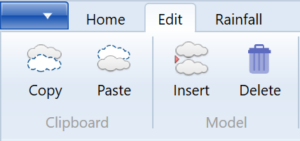
The software provides editing functions which allow you to insert, delete, copy and paste hydrographs. These functions are found on the Edit tab on the Main Window and are best performed while viewing your model from the Table tab.
How to Copy, Paste and Delete Hydrographs
You may select any “Runoff” hydrograph and click Copy. After that you may paste this hydrograph into any available rows on the Table or on the Basin Model for the next hydrograph number, by clicking Paste.
Likewise, you can delete any hydrograph by selecting it and clicking Delete.
Inserting and Renumbering Hydrographs
There will be occasions where you may want to change the number of a hydrograph in order to satisfy the requirement that hydrographs must progress from upstream to downstream. This is easily accomplished by inserting hydrographs in your model.
You can insert hydrographs anywhere in your model by simply selecting a hydrograph row, the insertion point, and clicking the Insert button on the top Ribbon menu’s Edit tab. This will insert a new, blank row on the table and push the remaining downstream hydrographs down by one row, increasing their number by one.
The example below shows how to insert a new hydrograph, Hydrograph 6, into a model.
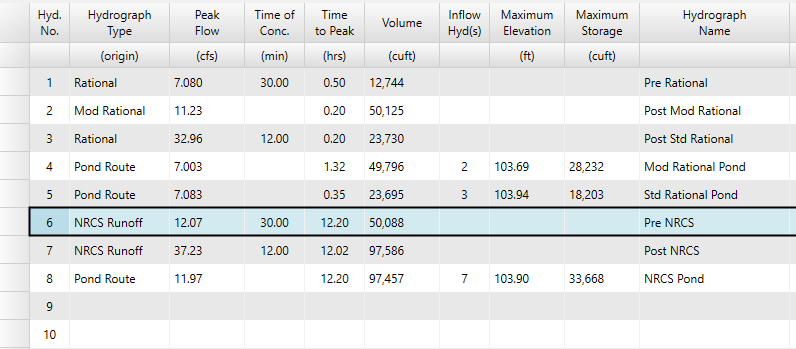
Select Hydrograph 6 and then click Insert.
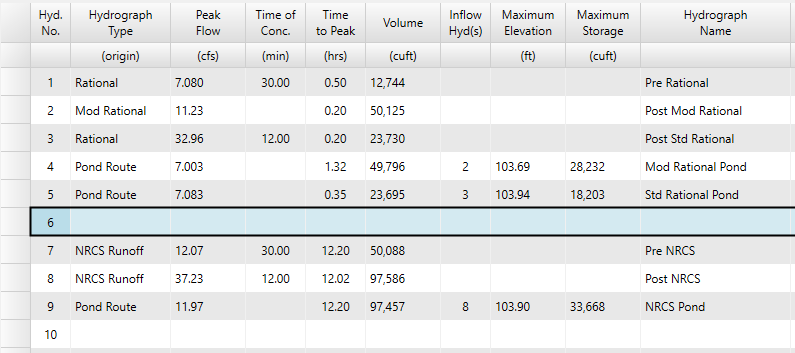
Notice how Hydrographs 6 through 8 were pushed down and are now Hydrographs 7, 8, and 9. Number 6 can now be used to create a new hydrograph.