
Once your reach has been imported or created manually, you can import cross-sections and their channel geometry. Note that your reach system must exist prior to adding or importing any cross-sections.
Importing Cross-sections is similar to importing reaches. Select Import Cross-Sections from the Import button on the side toolbar (Model tab) to open up the Import dialog. You’ll be asked to browse to, and select, the .csv file.


Once your file is selected, the software will preview the contents show the following screen.
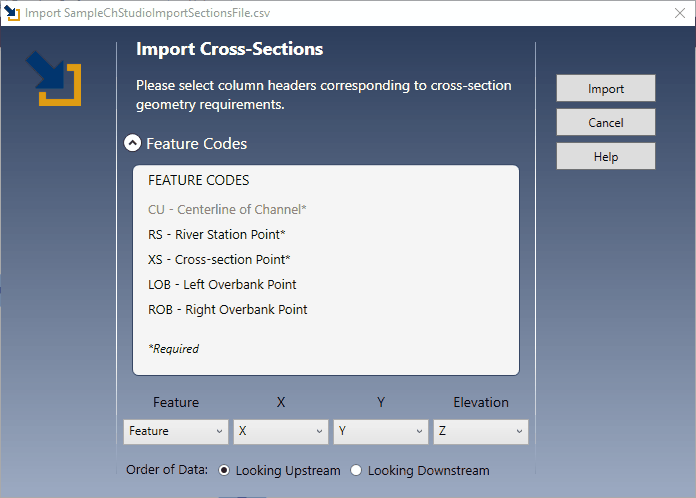
Note the Reach Feature Code, “CU” is grayed-out here because it is not required for importing Cross-sections.
Be sure that the Feature Codes, “XS” for example do not contain any leading or trailing spaces. It must be written as “XS” or “RS” in the csv file, not ” XS” for example. You also are required to include the header information, “Feature, X, Y, Z”.
Select from the drop-down list boxes the columns in your file containing the Feature Codes, X values, Y values and Elevations. Then select the radio button indicating the direction the data was collected and saved, i.e., looking upstream or looking downstream.
Click [Import].
Your plan model will be updated with the new cross-sections. From there you can make cosmetic adjustments to the reach width, etc.