
After setting up your model, (adding reaches, sections, geometric data and flow rates) it’s time to compute some results. Computing profiles is very easy with Channel Studio. It goes through great lengths to insure the integrity of your input data. If something is out of order, it will alert you immediately. But at this point, it might be a good time to save your your project file, especially if you have a lot of cross-sections with a lot of data.
This article teaches you how to compute the water surface profiles. For more in-depth discussion of how Channel Studio computes, please see Computational Methods. Also visit the Reading Room for even more discussions.
You can compute profiles at any time and from any of the major tabs, i.e., Model, X-Sections, Profile, Plan or Results.
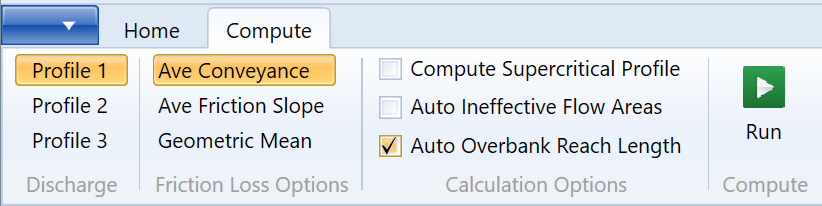
To compute, click on the ‘Compute” tab on the top Ribbon Menu and click [Run]. Depending on which tab you are viewing, you will see immediate results.
Computing Options
Here are a few options you’ll have when computing.
Discharge Profile
Please choose one of the three flow profiles. These correspond to the flow rates that were entered earlier in the Flow Data tab as well as the Starting Tailwater elevations at Section No. 1.
Friction Loss Options
Channel Studio will use up to three methodologies for computing friction losses. Any of these methods will give satisfactory results as long as your reach lengths aren’t too long.
- Average Conveyance – Best overall
- Average Friction Slope – Best for mixed flow regimes including subcritical and supercritical flows
- Geometric Mean – Best for steeply sloped channels in supercritical flow.
The Average Conveyance is known to provide the best overall results and is the default method used in Channel Studio as well as other well known programs such as HEC-RAS. More information on the details of this option can be found in Computational Methods.
Compute Supercritical
When this option is checked ON, Channel Studio will attempt to compute a supercritical profile. Channel Studio will use up to a maximum of 25 trials to compute subcritical water surface profiles. If a solution cannot be found, it assumes critical depth and moves onward to the next section. If this calculation option is checked On, then Channel Studio will automatically compute a supercritical profile.
Natural open channels typically flow in a subcritical state so it is recommended to keep this option Off. However, if viewing your profile you find some sections where the water surface is at critical depth and the channel slope is steep, you may want to investigate by turning this feature On.
When Turned Off
If Channel Studio cannot balance the energy equation within a low tolerance, it assumes critical depth and moves upstream, regardless if this option is on or off. If this occurs, you should first investigate why. A no-solution may be due to inadequate number of cross-sections or too large of change >30% of conveyance between sections.
Turned On
If this option is turned on, when the calculations reach the very upstream end, the software turns around and checks for any sections that were left (assumed) at critical depth. It begins at the first one and computes a supercritical profile in the downstream direction. It computes this profile until it cannot find a supercritical solution. It is between these two sections where an hydraulic jump may occur.

Jump Location
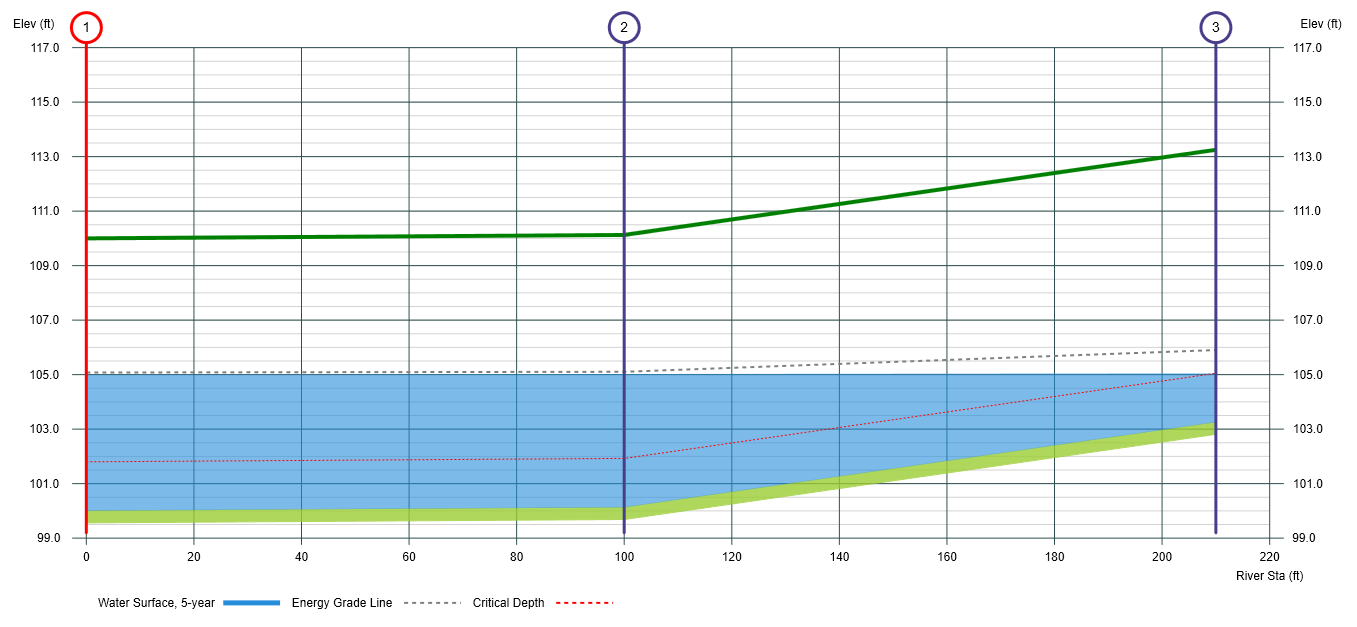
In general, hydraulic jumps are difficult to locate on natural channels. Using concepts of momentum or Specific Force, the program attempts to determine if in fact a jump is in place. If so, you will see it on the profiles as shown above. If not, it will provide a message.
Notice in the profile plot above the energy grade line (EGL) dips upward after the jump (as moving downstream). It should dip down indicating a loss of energy, not a gain. This is a tell-tale sign that the jump probably occurs further upstream.
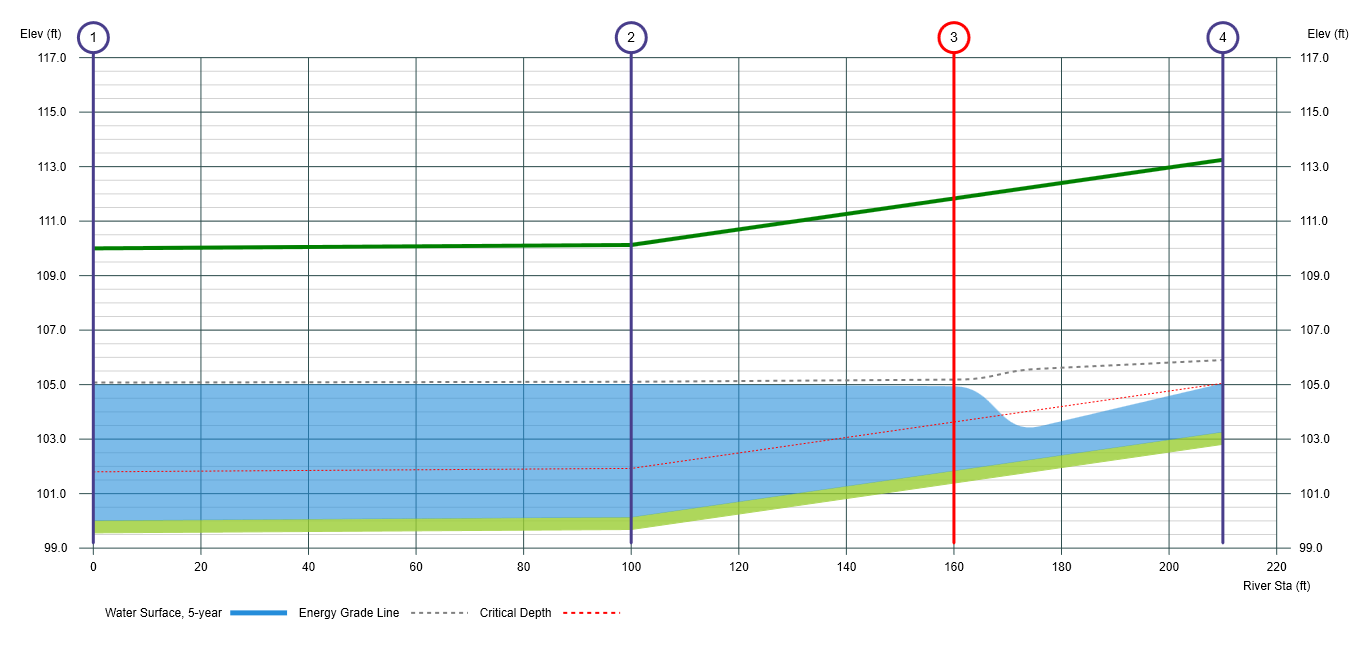
The best way to locate this jump is to insert additional sections. For example, in the profile shown above, it’s assumed the jump is located somewhere between Sections 2 and 3. By inserting and interpolating a new section between 2 and 3, we might better locate it. With the newly inserted section, the EGL decreases, indicating an energy loss as it should.
Auto Ineffective Areas
Use this feature to have the software automatically compute and insert ineffective flow areas on channel sections downstream and upstream of Bridge and Culvert sections. See Ineffective Flow Areas for more information.
Auto Overbank Reach Length
Use this feature to have Channel Studio automatically calculate the left and right overbank reach lengths based on the flow profile and center-of-mass locations of the overbank flows. Please see, “Auto Overbank Reach Lengths” article for complete details.
Best Practices
Once computed you can instantly view your results in a variety of places, most notably, the Sections, Profile, Plan and Reports tabs. In addition, you can view even more detailed results on the Results tab. This provides many details, section-by-section.
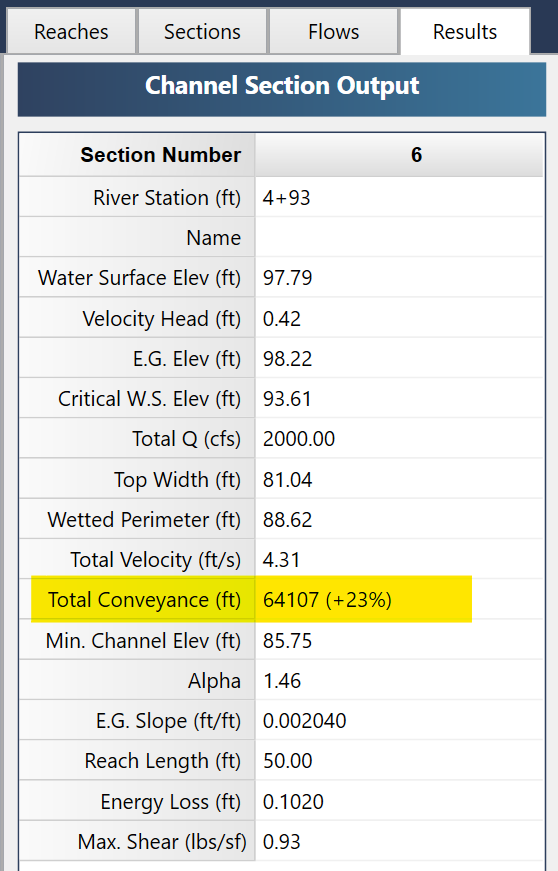
If you’re struggling to get satisfactory results, remember that the biggest reason why models fail is due to inadequate number of cross-sections resulting in large changes in conveyance or velocity head from one section to the next. Total Conveyance should not change by more than approximately 30% and velocity head should not change by more than 1 foot. If this happens, Channel Studio will highlight the Total Conveyance output in yellow.
When working with steady flow, think gradual. Avoid sharp changes in the channel and section geometries. Here are some best practices to guide you.