Stormwater Studio has three reports that have been pre-formatted. Namely:
- Standard
- HGL
- Inlets
In certain instances, it may be necessary to adjust the format of a report to align with the specifications of a local drainage authority or for other specific purposes. Two customizable reports (Custom1 and Custom2) are available for user modification. This is where you can designate which output variable will be displayed in each respective column.
There is a selection of more than 90 pre-set variables to choose from, along with the option to assign a custom report name. Once configured, Stormwater Studio will store and reload the reports automatically each time the program is launched. No manual file management (opening or saving) is required as it operates seamlessly.
If desired, you have the ability to export and import these personalized reports for future use or to share with a colleague who also utilizes Stormwater Studio.
To access the custom reports, simply activate the Results tab by clicking on it. The Reports toolbar will then be visible at the top left corner

Using the Reports Builder
Click on Custom1 or Custom2. Then click the Edit Reports button on the right.

This opens the Custom Reports builder.
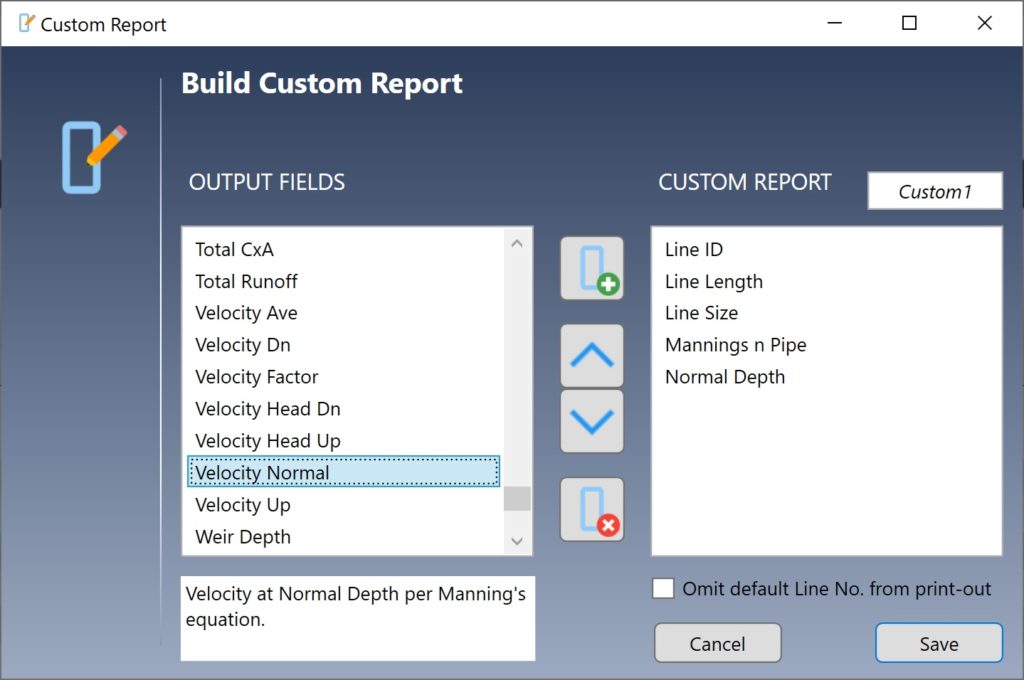
This screen allows you to build your own reports by selecting output variables from the list on the left, OUTPUT FIELDS, and adding them to your report on the right, CUSTOM REPORT. You can name your report by modifying the text in the upper right. The default is Custom1 or Custom2.
Adding Columns to Your Report
To add a new column, scroll through the OUTPUT FIELDS; highlight a desired variable; then click the Add Column button. Rows, which actually represent the report columns, are added to your report left to right.

The limit to the number of columns you can add is 40 but after about 20 (Letter size) and 30 (Tabloid size), it will exceed the maximum width of the final printed report. Columns outside of the page boundaries will be omitted from the printed report but will be visible on the screen version. Screen versions can be exported as .csv files for further customizing.
Also note that Column 1 is reserved for the Line Number. It is not shown on the Custom Reports Editor screen but will appear on the finished version.
Removing Columns
You can remove a single column or a selection of columns by highlighting them on the CUSTOM REPORT list and clicking the Remove Column button.

Rearranging Columns
Once added, you can move any column variable up or down by selecting it and clicking on the Move Up/Down buttons.

Omit Default Line Number from Printed Report
The Line No. field will always show on the screen version of your custom reports in the first column. You can remove this item from the printed version by checking this option ON.
Saving Your Custom Report
When finished, click the [Save] button. The column selections are saved along with all other Stormwater Studio settings and are reloaded upon each start-up.
Sharing Your Custom Reports
![]()
Each custom report is automatically saved deep inside of the program’s settings so there’s very little for you to do to manage them. However, there may be times that you want to save your reports to re-use later or give to a colleague to use. This can be accomplished by using the Share option. This allows you to Export and Import previously created custom reports.
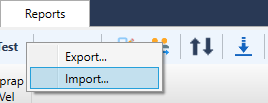
The Share button will provide two menu choices:
- Export – This allows you to export the currently selected Custom Report (1 or 2) to a simple text file (anyfilename.rpt). Anyone can then Import that “anyfilename.rpt” file. Once Imported, it will be automatically saved to that user’s Settings file, just as if they created it themselves. It will automatically reload upon launch.
- Import – This allows you to open a previously exported report as described above. The imported report will be placed in the currently selected Custom Report (1 or 2).