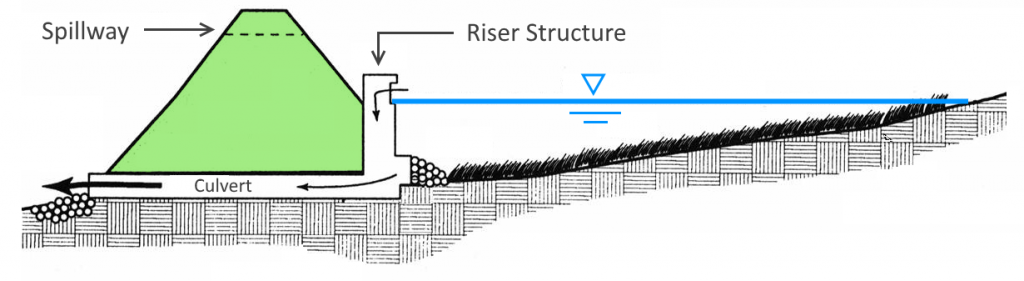
A primary function of Hydrology Studio is detention pond design and routing. This section describes how to set up a detention pond. Once set up you can route any existing hydrograph through it.

A maximum of 25 unique ponds can be set up for any given project. Each pond can contain a wide variety of outlet devices acting independently or in series with a culvert as “Multi-stage” configurations.
Since a Pond is not technically a hydrograph, its icon is not displayed on the Basin Model.
Creating a New Pond
To begin, click on the [Pond] button on the Ribbon Toolbar or the small pond button on the Pond Route input box.

This opens the Pond Designer window. The Pond Designer is setup in a wizard-like way and will guide you from start to finish using just three steps. You can freely navigate back and forth between steps until your design is complete. The first step is optional.
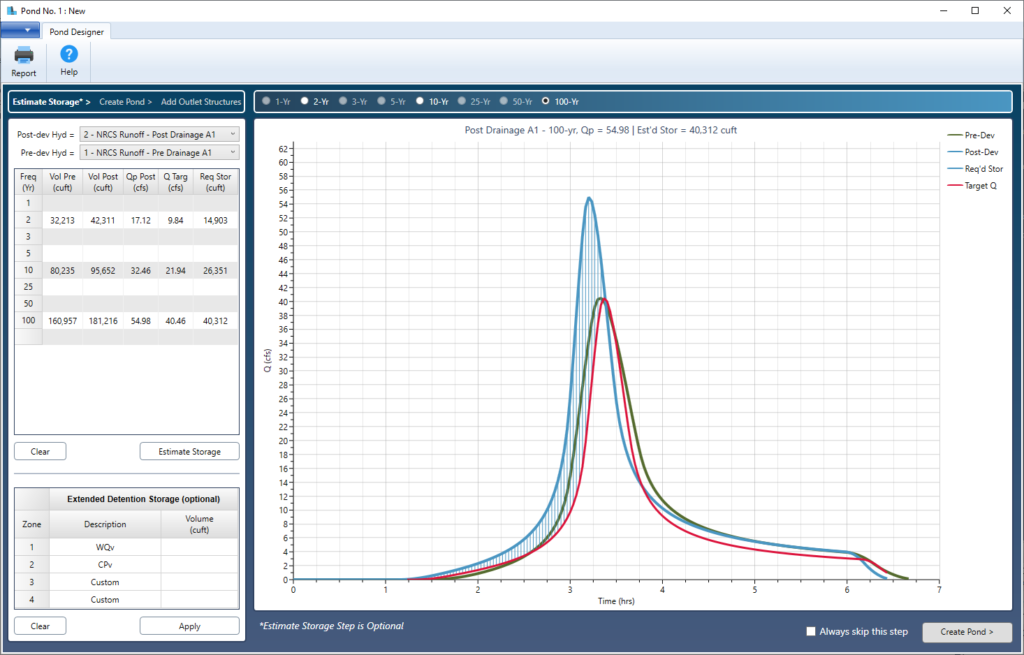
- Step 1 – Estimate Storage (optional step and includes extended detention options) This step provides you with an estimate of how large your pond should be. It will use a specified Inflow hydrograph and Target outflows.
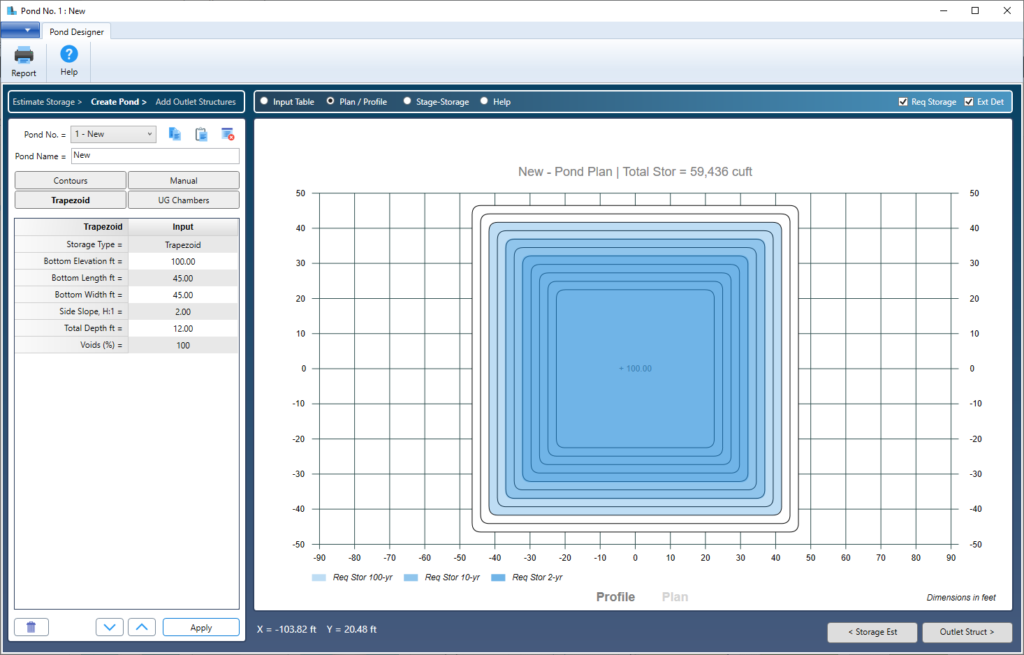
- Step 2 – Create Pond. This steps allows you to build the pond itself using a variety of methods, to match the estimated storage from Step 1, or by entering known data such as contours.
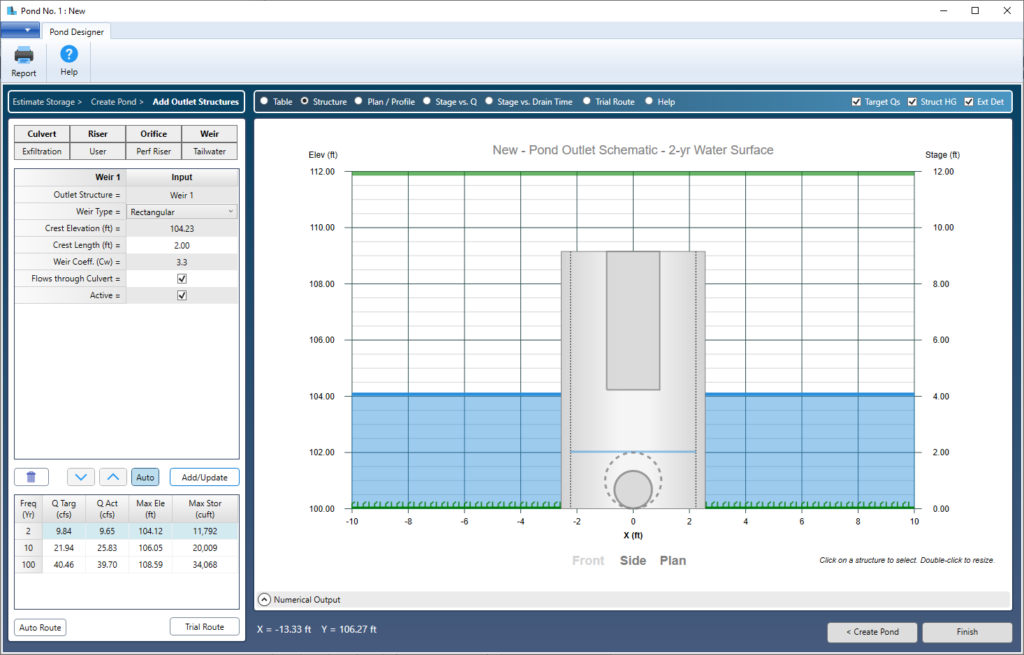
- Step 3 – Add Outlet Structures. The final step is where you add outlet devices like culverts, orifices, weirs, etc. It also allows you to perform intermediate trial routings so that you can arrive at a final design quickly.
These three steps are navigated back and forth using buttons in the lower right corner of the Pond Designer window.
A Step-by-Step Tutorial
Here is a step-by-step tutorial that walks you through a complete detention pond design.
Editing a Detention Pond
Once you created your pond and have used it in your Basin Model, there will be occasions you’ll need to return to the pond to make some changes and adjustments. The easiest way to do this is to select the Pond Route hydrograph on the Basin Model, Table or Charts and click the Pond button on the Ribbon Toolbar.
The program will know which pond you are wanting to edit by it’s association with the hydrograph you just selected. The Pond window will open where you can begin to apply your changes.
Each of these three steps are discussed in more detail here.