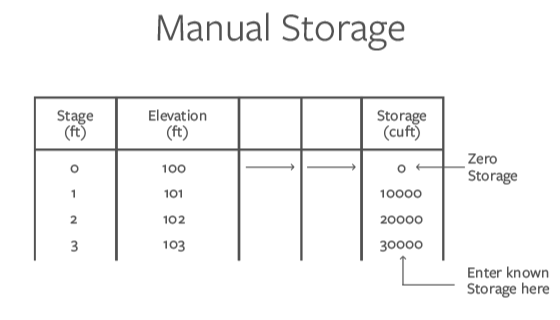
This storage option allows you to enter stage, elevation and total storage values manually. This option can be most useful when you are working to duplicate an existing study or already know the stage-storage values. Contours and incremental storages are not required.
In addition, you can copy Elevation | Storage data from a spreadsheet or other source, and then paste into the input table, saving you the time it would take to manually enter those values.
Keep in mind that you will not be able to use an exfiltration component as an outlet device when employing Manual Storage. The Manual Storage does not have defined surface areas for which to apply an exfiltration rate.
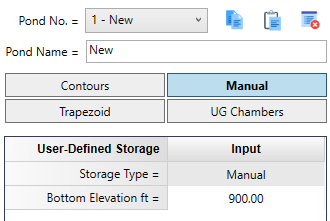
 To use this feature, select Manual from the storage options.
Ponds created using Manual Entry cannot use exfiltration as a discharge as there is not a contour or surface area to apply it to.
Required Data
The following is a description of each of the required input items.
Bottom Elevation
Enter the elevation of the bottom of the pond.
Voids (%)
This value defaults to 100 and is useful for modeling gravel-filled trench drains. It allows for a reduction in storage due to gravel fills and such, but still allows the total surface area available for exfiltration calculations.
Click [Apply] when finished. This sets up the Stage-Storage input table for storage entries.
Stage
Type in the stage value. The first stage value (Row 0) is always 0 and will be skipped. Press the [Tab] key to move to the Elevation column.
Elevation
Type the elevation corresponding to this stage. In most cases this value is displayed as a default. Simply press [Tab] to accept and proceed to the next item.
Total Storage
Total Storage at stage zero must be zero. Type in the value and press [Tab] to advance to next Stage. You are not required to enter data for all of the available stages, but at least 3 are required.
When you are finished entering data, click the [Apply Storage] button near the bottom of the table.
How to Copy & Paste Elevation | Storage
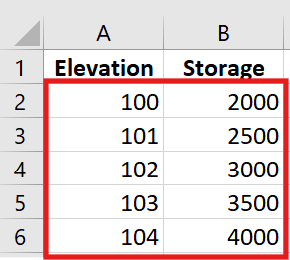
This function allows you to copy & paste elevation and corresponding data values from a variety of sources. Below is an example of Elevation | Storage data in a spreadsheet. The elevations are in one column and the Storages in the adjacent column. These should be selected and copied to the clipboard. No need to copy the column headings.
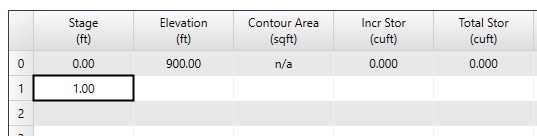
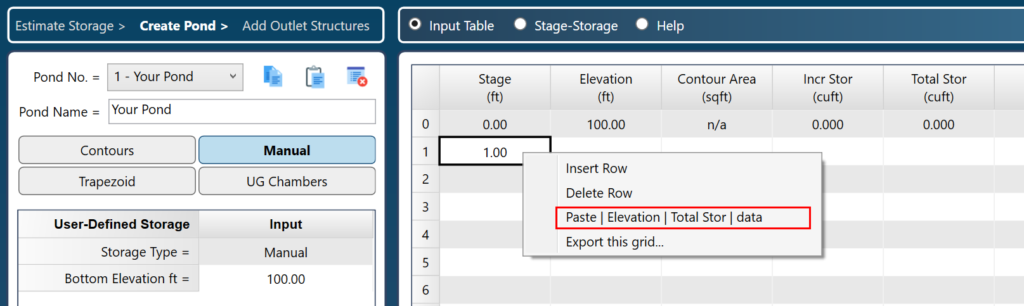
Next, place your cursor on the first row of the Table. Then right-click and select Paste | Elevation | Total Stor | data in the pop-up menu.
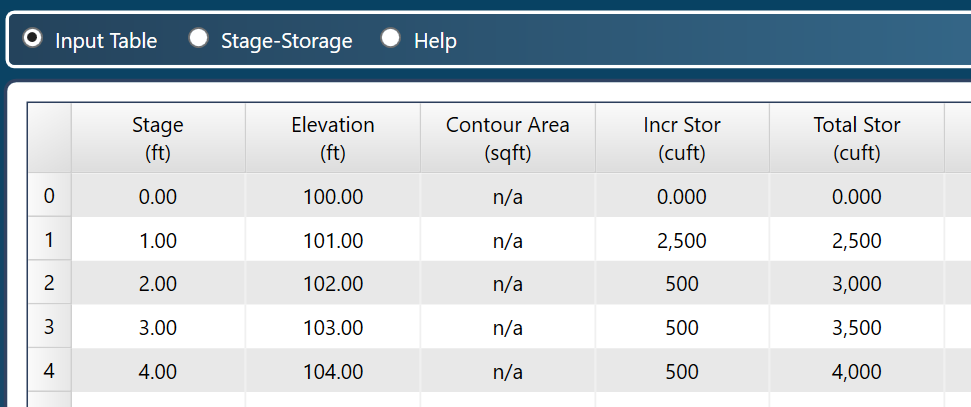
The table will populate itself with the data as shown below.
Next, click the [Apply Storage] button at the lower right of the Table.
Stage-Storage Chart
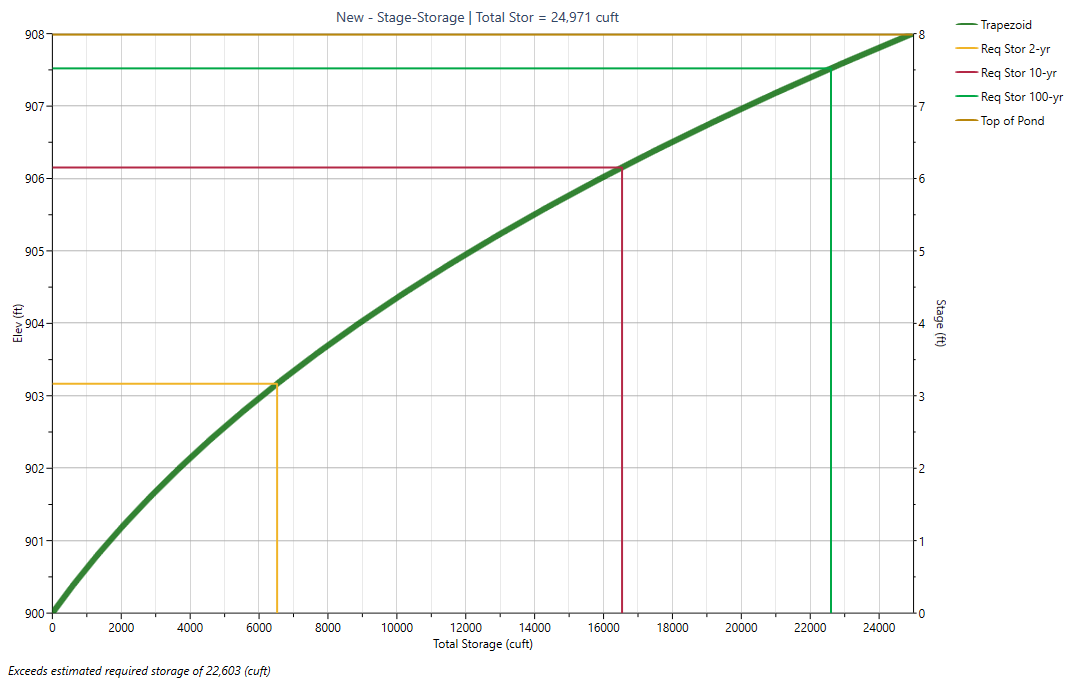
You can quickly view a chart of the Stage-Storage by clicking the Stage-Storage radio button. Notice in the chart below how the estimated required storages from Step 1 are plotted. The lines provide you with the corresponding elevations at each return period. For example, the estimated storage for the 100-yr event requires that it fill the pond up to elevation 907.5.
Now click the [Next] button to proceed to Step 3 – Outlets.