RainMaps™ is an incredible cloud-based server that houses the specific rainfall files for Hydrology Studio Suite (.idf and .pcp). Normally, you would have to manually input the data or import it from NOAA Atlas 14, but we’ve done all the hard work for you. With just a few clicks of your mouse, these files are readily accessible to you.
We selected hundreds of cities across the U.S. with populations greater than 50,000. We then extracted the precipitation and intensity data for each city directly from NOAA Atlas 14 Precipitation Frequency Data Server. This data was then imported into Hydrology Studio and processed to create the final IDF Curves (.idf) and Precipitation tables (.pcp). These are ready-to-use files for which you can open and start using in your software. No need to import or manually enter any data.
What’s more is that your Rational Method, NRCS and Malcom hydrographs will be created using the latest hydrometeorological data. Note that these files can be downloaded and opened in Hydrology Studio, Stormwater Studio, Culvert Studio and Studio Express. (Stormwater Studio and Culvert Studio do not use the Precipitation (.pcp) files.)
How to Get Your Local Rainfall Files
Click the RainMaps button on the Rainfall tab at the main window.

This opens Hydrology Studio’s online RainMaps™ page in your default internet browser.
You’ll first see a map of the United States including Alaska and Hawaii.
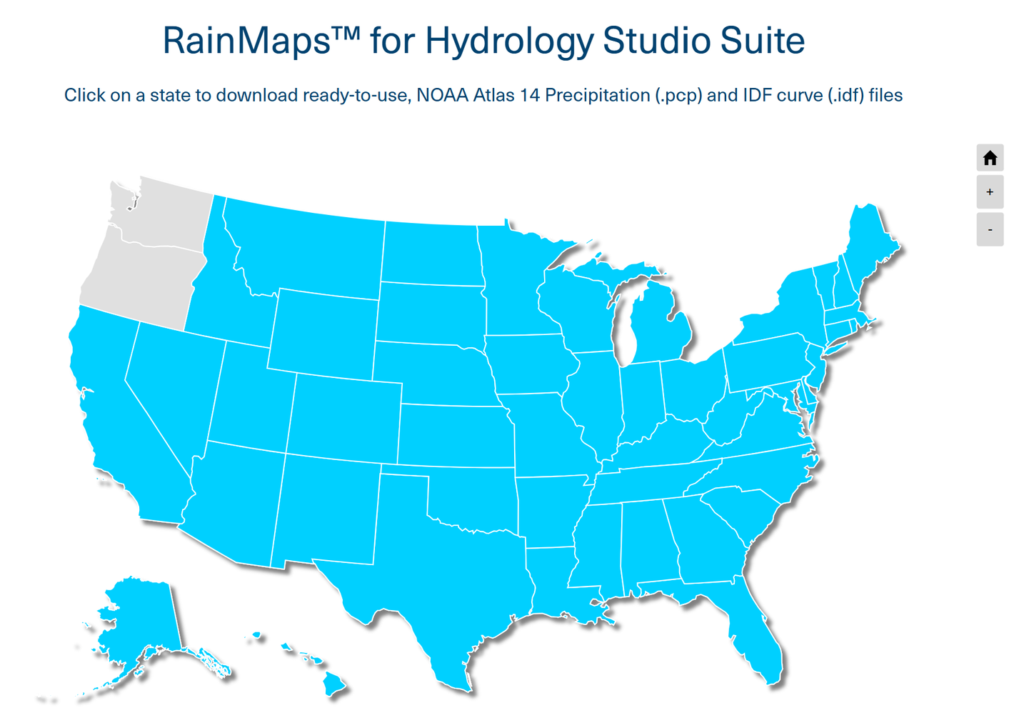
Select Your State
Click on your desired state. This loads a larger map of the selected state with the available cities. The example below shows South Carolina. Each city contains rainfall files.
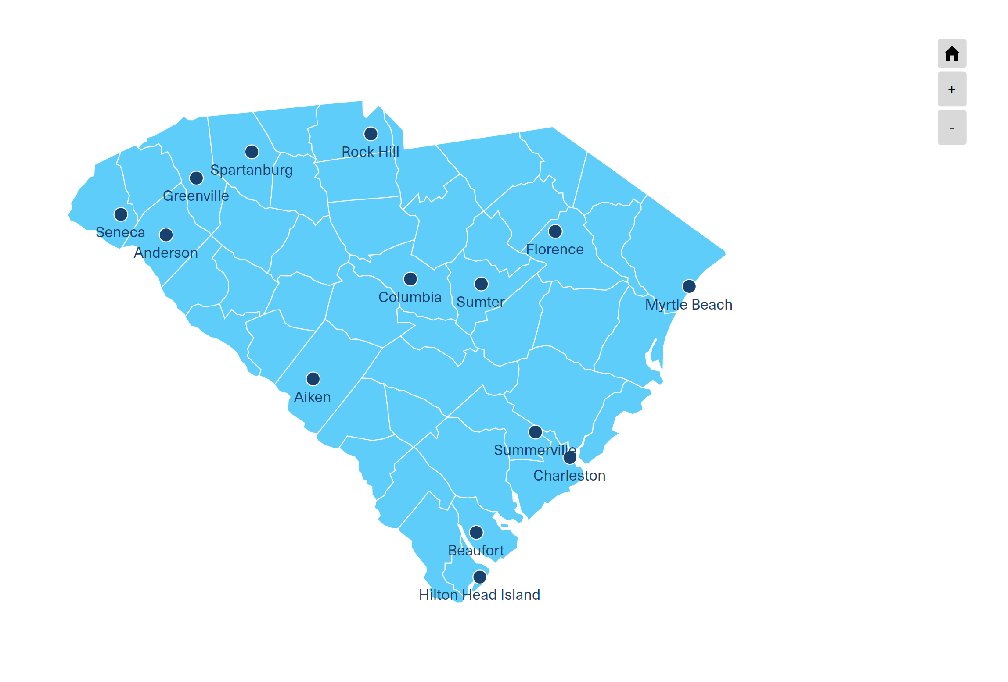
Select Your City
Click on the city closest to your project area.
Download the Rainfall Files
From the ensuing pop-up lightbox, click the Precipitation button to download the precipitation (.pcp) file. Then click the IDF Curves button to download the associated IDF curves (.idf) file.
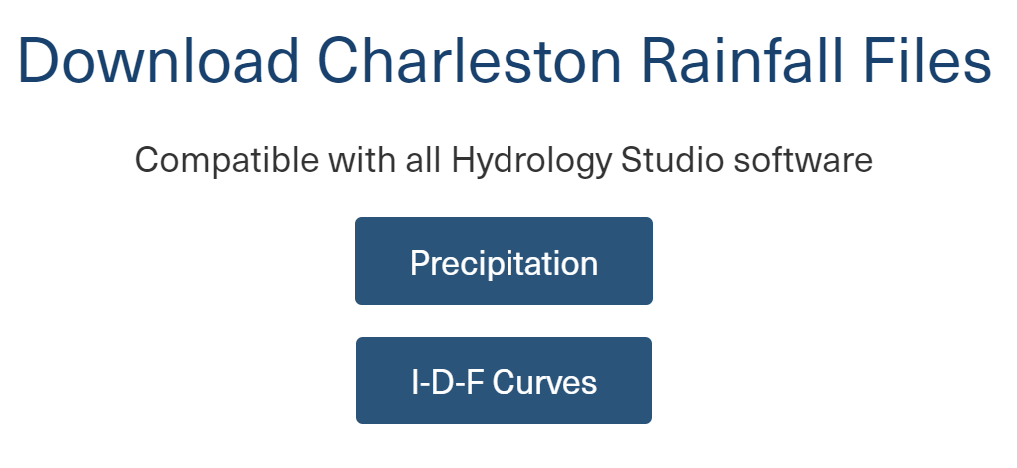
These files will typically be sent to your PC’s Downloads folder. We recommend moving them to your dedicated Rainfall folder. Once downloaded and moved to your desired folder, they are ready to be used in Hydrology Studio software.
Again, the .pcp file contains the design storm precipitation values for use when creating NRCS hydrographs while the .idf file contains the Intensity vs. Time data for use in creating Rational method hydrographs.
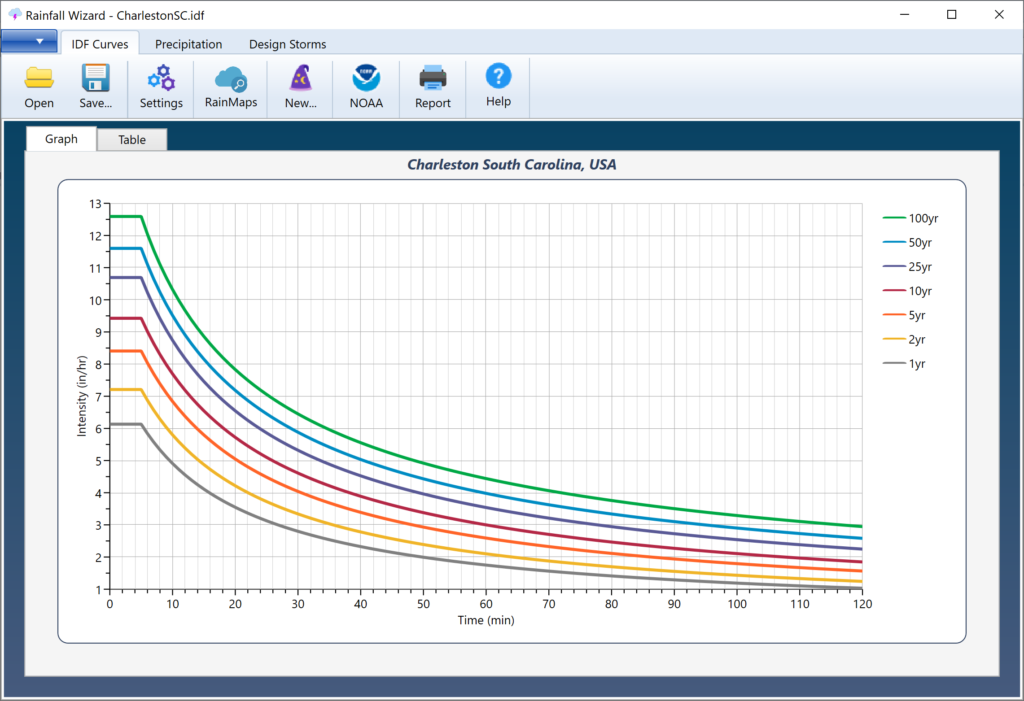
Load the IDF Curves Into Hydrology Studio
Click Open as shown below and then choose IDF Curves (idf).

Navigate to the downloaded .idf file, for example, CharlestonSC.idf, and click Open.
Load the Rainfall Precipitation Into Hydrology Studio
Once more, click the Open button and select Precipitation (pcp). Navigate to the downloaded .pcp file, for example, CharlestonSC.pcp, and click Open.
Select Return Periods
Next you’ll need to select the Return Periods you wish to use. Once these are selected, all hydrographs will be generated using these Return Periods. They can be changed at any time.

The setting above has the 2, 10 and 100 year return periods activated. The others are turned off and will not be used.
Select a Design Storm
Now you’ll need to choose the design storm that you wish to use when creating NRCS hydrographs. In the example above, the current selected storm is the Balanced Synthetic 6-hour storm. You can reselect a storm from the drop-down list.
You are now ready to create hydrographs. You can change any of the settings on the Rainfall tab at any time. When you exit the software, you will be asked to save any changes to your settings that you may have made. Any setting changes will only affect the Precipitation (pcp) file as it is this file which stores the selected return periods.
Viewing and Editing the Rainfall Data
It’s not necessary but if you wish to verify and/or edit the rainfall data, open the Rainfall Wizard by clicking the Rainfall button.

You’ll then see the new IDF Curves. Click on the Precipitation tab to view the NRCS rainfall. You’ll see the precipitation table populated with the rainfall data as shown below.

If you make any changes to the settings here, be sure to click [Apply] afterwards and re-save the file.
Now close the Rainfall Wizard and return back to the Main Window. Your hydrographs will now be created using this data. These files will automatically open upon each program launch so there’s no need for you to return here.