A variety of Design storms can be imported from existing files of type .txt, .csv or even legacy .cds files. This article will show you how to import design storms without having to manually enter them in, point-by-point. You will basically need to save your data into a simple format as a .txt or .csv file. Like all other rainfall data, you’ll only need to do this once. The software automatically loads them upon launch. Custom Storms are also embedded in your project files.
Required File Format
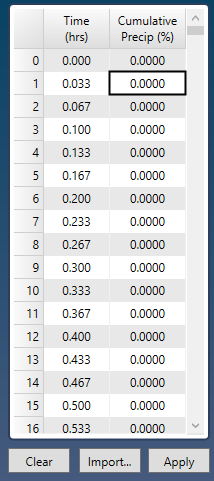
The file is a single column of numbers saved as a .txt or .csv file. The following format must be used:
Time Interval in minutes
Precip Ratio at Time Interval 1
Precip Ratio at Time Interval 2
Precip Ratio at Time Interval 3
Precip Ratio at Time Interval 4
Precip Ratio at Time Interval 5
.
.
Precip Ratio at Time Interval n (n<= 2,880)
Sample Custom Storm File
Here is a sample file used for the New Jersey Water Quality Storm. It has a time increment of 5 minutes and a total duration of 120 minutes. The first value is 5 representing the Time Interval of the values in minutes. The values following represent the ratios at each time increment and proceed up to 1.0. Do not include the ratio at time zero.
5
.0066
.0133
.02
.04
.06
.08
.1064
.1328
.16
.2066
.2866
.5
.7134
.7934
.84
.8672
.8936
.92
.94
.96
.98
.9867
.9934
1
Don’t worry if the imported storm is in a time interval different from what is currently being used in Hydrology Studio. It will automatically convert the values using a straight-line interpolation.
To import, click the [Import…] button. Choose the file you wish to import and click [Open]. Hydrology Studio will populate the table with the precipitation ratios.
Click [Apply] to accept.
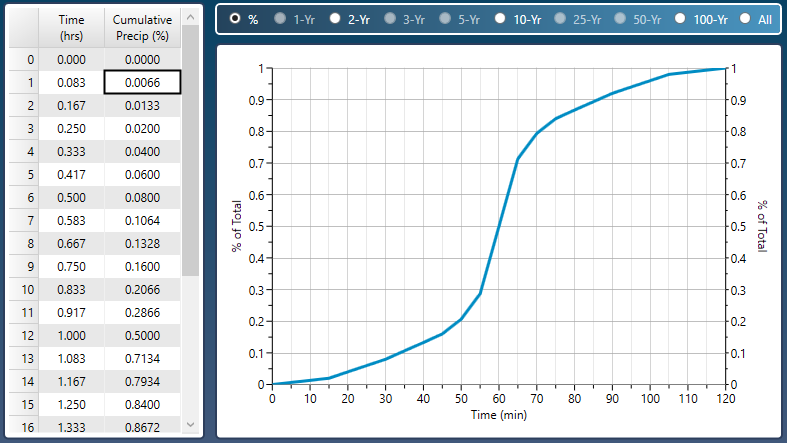
The sample custom storm shown above would look like this:
Save your storm(s) by clicking [Save] on the Ribbon Toolbar and specifying a name for your file. A “.cds” extension will applied. This file will automatically open each time you launch Hydrology Studio. You can change this file any time afterwards.
Click the [Open] or [Save] buttons to open or save an existing .cds file.
This same procedure can be used on any design storm distribution, for example, the latest NOAA temporal distributions. Again, just create a simple .txt or csv file with one column. The first number is the Time Interval of the data in minutes (NOAA typically uses 0.5 hrs or 30 minutes) followed by the cumulative ratios at each time increment proceeding up to 1.0. Do not include the ratio at time zero.
Importing Dimensionless Distributions
There are Custom Distributions provided by drainage authorities that are in a dimensionless format. For example, NOAA 14 Volume 2 dimensionless distributions for the Ohio River Basin and Surrounding States.
Another example is the state of Indiana which requires the use of 4 unique distributions in four different zones, derived from the Huff Distributions. They only provide the precipitation ratios corresponding to a “percentage” of the total storm time. Thus actual points along the time axis.
The table shown below represents one such distribution. The column on the left refers to the percentage of the total storm (could be 1 hour, 2 hours, 6 hours, etc..) The values on the right represent the cumulative precipitation as a ratio of the total precipitation.
| % Storm Time | Evansville, IN 1st Quartile |
|---|---|
| 0 | 0.0000 |
| 10 | 0.2282 |
| 20 | 0.4469 |
| 30 | 0.5711 |
| 40 | 0.6533 |
| 50 | 0.7143 |
| 60 | 0.7815 |
| 70 | 0.8466 |
| 80 | 0.9000 |
| 90 | 0.9536 |
| 100 | 1.0000 |
In these cases you would need to manually interpolate between the Precipitation Ratios to get them in to the current Time Interval. Obviously a lot of mundane work. Luckily, Hydrology Studio can do this work for you. All you need to do is import these values as-is.
Example Creating a 1-hour Storm
Here’s an example of setting up the 1-hour Custom Storm from the table above:
1. Create a simple txt or csv file with only the precipitation ratios. Do not include the ratio at time zero because it’s always zero. The 1-hour file will look like this:
6
0.2282
0.4469
0.5711
0.6533
0.7143
0.7815
0.8466
0.9000
0.9536
1.0000
You’ll notice the first value is the Time Interval (TI) associated with this 1-hour storm in minutes. It is computed as: 60 minutes (1-hr) divided by 10. The 10 refers to the 10 increments provided by the dimensionless distribution, i.e., 10%, 20%, 30% … 100%. In other words, each value is 6-minutes apart. Thus the Time Interval should be listed as 6.
Now you simply need to import this file as a Custom Storm. Here’s how:
1. Go into the program’s Settings (top Ribbon Menu) and set the Time Interval to 1-minute. (Recommended for any storms less than 24-hours.) Set this to 1 for both “This Project Only” and the Default.
2. Open the Rainfall Wizard and click on the Design Storms tab.
3. Select “My Custom Storm 2” under the Custom Storms. (Could be any of the 10 Custom Storms.)
4. Import the storm distribution using newly created csv or txt file by clicking the [Import]button and selecting your txt or csv file. Click [Apply].
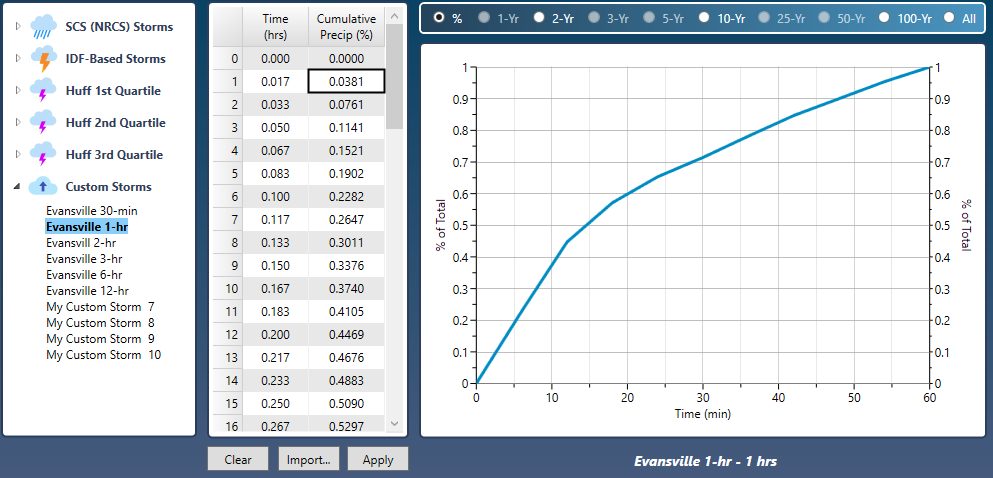
Even though the Program’s Time Interval is currently at 1 minute, you’ll import this storm using a 6-minute Time Interval. Hydrology Studio will automatically interpolate the numbers into a 1-minute TI. The imported storm now looks like this:
Importing other distributions works exactly the same way. Just change the first value in the file. For example, the 30-minute Storm will have a value of 30/10 = 3. The 2-hour will be 120min/10 = 12. The 3-hour storm will be 3(60)/10 = 180min/10 = 18. The 6-hour 6(60)/10 = 36. The 6-Hour Storm file will look like this:
6-hour Distribution File
36
0.2282
0.4469
0.5711
0.6533
0.7143
0.7815
0.8466
0.9000
0.9536
1.0000
Assign Precipitation Amounts
After importing you’ll need to assign precipitation amounts to apply to this storm for each return period. At this point you only have a distribution. Select the “Precipitation” tab on the Ribbon Toolbar to open up the Precipitation Manager where you can enter the corresponding rainfall amounts that will be applied to these distributions. See, Choose Design Storm and Return Periods for discussion.