
Once you’ve become familiar with the Trial version, there are three things you should do:
Create a folder to hold your project files
Stormwater Studio uses Microsoft’s “Click-Once” technology to install itself on your computer. As you may have noticed, it was very fast and easy. While it’s void of confusing options, it does not create file folders on your computer for your projects. It is recommended you create a folder to hold these. For example the following folder configuration is recommended under your Documents folder:
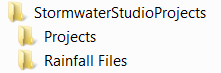
The Projects folder will contain your project files (filename.sws) while the Rainfall Files will contain your rainfall data described in the following section.
Set your system units
- U.S. Customary (default)
- Metric

It is recommended that you set your units before attempting to start a new project or open an existing one as the program cannot convert an existing project from one type of units to the other.
When you select your units, the program will automatically start a new project and will load its default, built-in IDF curves.
See also, Programmed Pipe Sizes for a list of the available pipes Stormwater Studio will use when designing.
Set up your local rainfall
This software ships with default rainfall data for which is useful while getting to know the program. But eventually you’ll want to setup your own local data. See, Setting Up Rainfall for instructions.
Tip: The companion products, Hydrology Studio and Culvert Studio use the same IDF file. If you are already using one of these products, you may open the rainfall files from its folder and use for this software as well.