Lets face it, detention ponds have a lot of moving parts and this can make designing them a lot of work… unless you know how to troubleshoot them. This article will help you investigate and hone in on solutions when things don’t go as planned.
A Quick Review
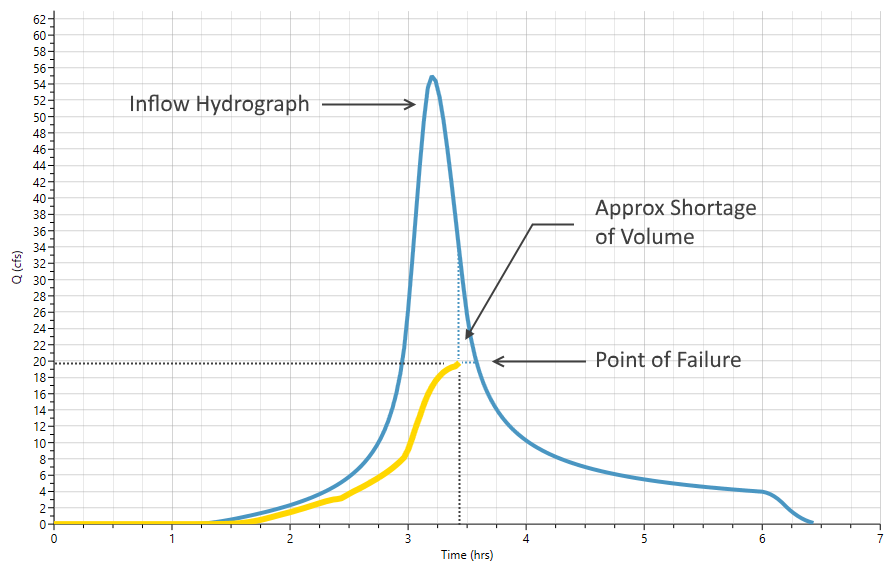
Lets review detention pond routing from a theoretical perspective but in layman’s terms. A detention pond is a vessel with volume which contains an outflow device. We pour water (the inflow hydrograph) into the pond at a varying flow rate going from small to large and back to small again over a give storm duration.
While this hydrograph flows into the pond we measure the amount of that flow (Qin) over a given time interval. If the Qin is 5 cfs and the Time Interval is 1 minute, the volume that flowed into the pond over that time span is 5 cuft/sec x 1min x 60 sec/min which equals 300 cubic feet of water volume.
Next we figure out how deep the water would be in the pond if 300 cuft were dumped in it. For example, say your pond is 10 ft x 10 ft x 5 feet deep with vertical sides. Three hundred cubic feet would fill it to 300 / bottom area of 100 sqft or 300/100 = 3 feet.
Next we need to figure out what that 3 feet of head would produce as an average outflow during that time step. This amount is dependent on the outflow device(s) but lets assume that your device allowed an average of 1 cfs (Qout) over this time period of 60 seconds. That amounts to 60 cubic feet of volume.
So, 300 cuft entered; 60 cuft exited; leaving (300 – 60) = 240 cuft left over in the pond. In simpler terms, what goes in minus what goes out is what’s Left over… storage.
This is a basic differential equation which is what most pond routing calculations are based upon. This procedure is explained in more detail here.
A Proper Start
First of all, make sure you follow the guidelines and suggestions in this article on How to Design a Detention Pond. This at least gets you off on the right foot if you’re approaching a new design. There’s only a single combination of pond volume and outlet configuration that satisfies a specific design.
If you’re analyzing an existing pond or you’re still having issues with a new one, take a quick look at the following common causes for detention pond failure.
- Most pond routing failures are due to the pond not having enough storage. As one can surmise from the example given above, one solution would be to let more water out. The more water you let out the less storage you’ll need, right? That 60 cuft going out could easily be 100 if the Qout were 1.67 instead of 1, thus reducing the required storage to 200 instead of 240. But that’s not always an option as the Q being released typically has a limit; Pre-development, Target Q.
Solution: Make the pond larger. Sorry. Here’s a hint: The pond size needs to be able to hold the amount represented by the blue shaded region shown below. The blue hydrograph is what goes in. The red is what goes out. Their difference, (up to the point where what goes out is higher) is the storage you’ll need.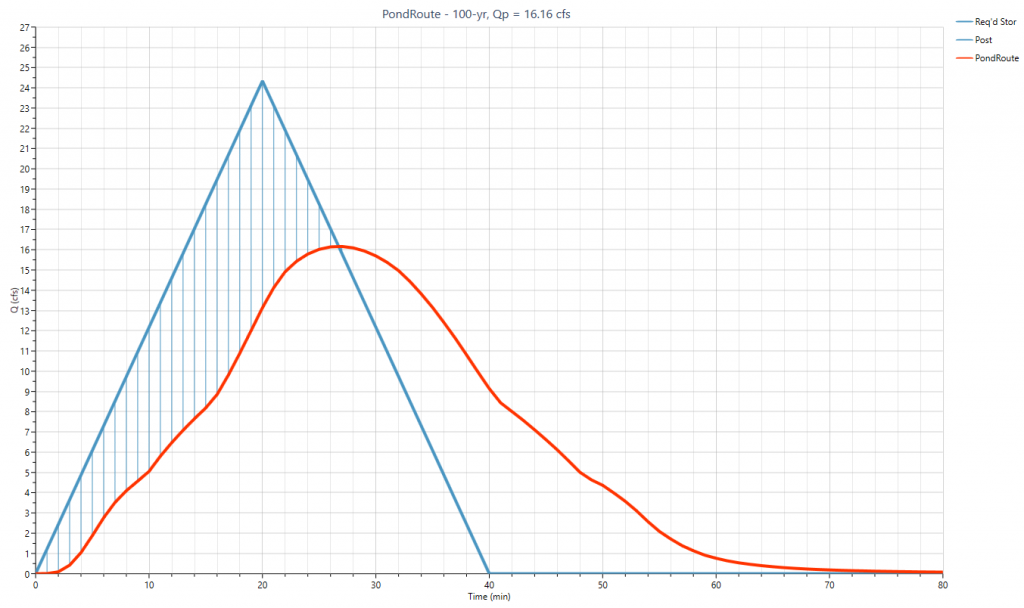
- You made your pond larger but it still doesn’t work. When things begin to make no sense, I always look at the stage-discharge curve. Often times the problem is that the discharge is too low, not letting enough volume out. Thus the volume is stranded in the pond causing an overflow.
Solution: Examine your Stage-Discharge curve. Make sure that your Target Qs are on that curve somewhere. Take a look at this Stage-Discharge curve. Lets assume your target Q is 35 cfs and this is your pond’s stage-discharge curve. See the problem? Thirty-five is nowhere to be found. It only goes up to 26 at full pool! It’s not releasing enough water volume. That left-over volume has to go back into the pond causing your over-fill. Adjust your outlet devices so that your Target Qs aren’t missing in action. They must appear on the graph.
 - You’re not getting any outflow at all. This is a not-so-rare occurrence. It happens more often that you’d think.
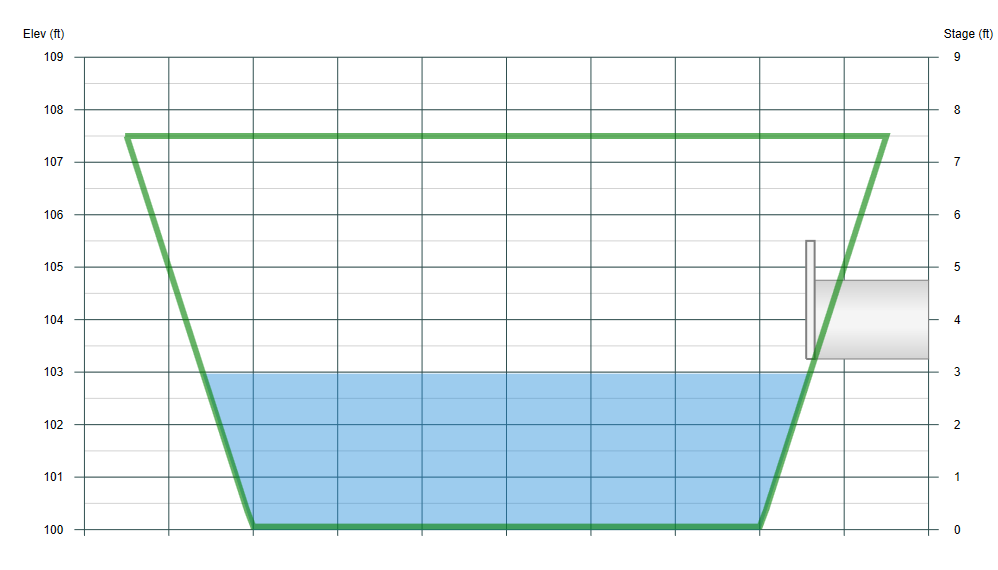
Solution: Is your pond absorbing the entire inflow hydrograph? This can happen when the outlet devices are up, off of the pond bottom. That space below just might be large enough to contain the entire inflow volume. It’s worth checking out. Also, check your exfiltration, if you’re using that. Its rate might be so high that the entire inflow hydrograph is infiltrating in the soil below.